Ryan E. Day | Contributing Editor / Content-Marketing Coordinator | Quality Digest | December 11, 2019
Plasan Uses FARO® QuantumS ScanArm to Inspect for Big Launches and Big Parts
Headquartered in Grand Rapids, MI, Plasan North America manufactures metal, composite, and ceramic-composite components for defense and commercial applications. Plasan brings decades of process experience to bear in creating the world’s most advanced armor, metal components and fabrications.
Challenge
Plasan has the vision to become the global leader in armor solutions based on innovation and quality. This vision spurs growth that regularly challenges their quality team to grow right along with production. Accelerating product development forced Plasan’s quality department to reassess the capability of their current inspection equipment.
“We were facing some pretty aggressive timelines on launch activity,” explains Tony Bellitto, Quality Manager at Plasan North America. “We were scheduled to launch 140 new part numbers and most of them included GD&T, not just basic measurements.”
Some of the parts Plasan manufactures are of considerable size and weight, which posed further challenges.
“Some of these products are up to eight feet across,” says Christine Foley, Senior Quality Engineer at Plasan. “One of the underbelly parts we produce for tactical vehicles weighs about 2,500 pounds.”
The large armor parts have multiple bends which are formed in a brake press. The sheer size and weight of the part complicates the inspection process.
“We’re dealing with multiple bends in up to 12 millimeters of ballistic steel,” says Foley. “And some of these parts have a surface profile tolerance of 60 thousandths of an inch.”
Looking at the long-term strategy for Plasan, it was clear that verifying tolerances with a typical fixed-CMM would not be the most efficient solution for inspecting the larger parts we produce,” says Bellitto.
“A traditional fixed-CMM has its place,” says Foley. “But some of these parts are so heavy they require an overhead crane to lift them into the brake press. You can imagine what they might do to the granite table of a fixed-CMM, not to mention the floor space required to house and operate one. On top of that, there’s just no way we could physically get these parts into the enclosed environment that fixed CMMs require.”
Solution
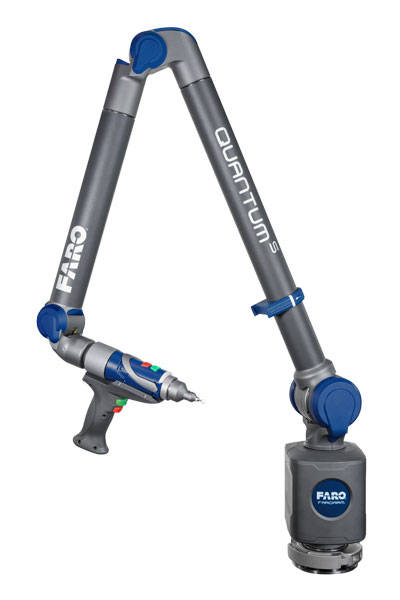
 Plasan chose a four-meter QuantumS ScanArm outfitted with a FAROBlu® Laser Line Probe HD high-definition camera as the main weapon in their inspection arsenal. The FAROBlu uses the most advanced complementary metal-oxide-semiconductor (CMOS) technology to deliver a fast frame rate (the number of times per second that the camera gathers new data on the part being scanned) of up to 600 frames per second.
“The QuantumS is so much more efficient,” says Foley. “I seldom have to leapfrog with it. I can either reach all the features that I need to on the part or only have to move it once, which significantly reduces both time and the risk of measurement errors.”
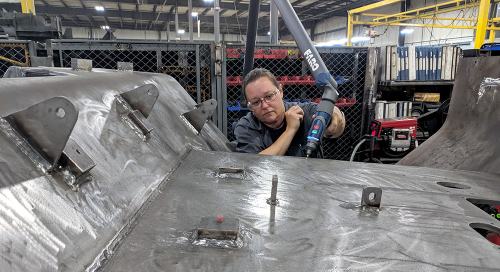
In some situations, dimensional measurements are being made while the part is still on the brake press.
“Especially when we're doing prototypes and first-offs, having Christine there verifying and working with engineering to make the corrections in real-time drastically reduces the time to get that bend correct,” stated Bellitto. “Most of our layout work is done near our brake machines on purpose. The flexibility and mobility of the QuantumS is a real asset.”
 Plasan relies heavily on their QuantumS for launch activity and any incoming subcomponent verification, such as submitting PPAPs (Production Part Pre-Approval Processes) or FAIs (First Article Inspections).
“We have a couple programs that we run on a day-to-day basis for features like welded fixtures that have to be qualified every six months or once a year,” explains Foley. “There are many non-fixtured parts that we have to inspect before they go out the door, so we may measure at the component level first and then, once they're welded, either I go to them or they come to me for a final inspection on the end product.”
FARO’s world-class customer service was a key factor in Plasan’s decision to invest in the QuantumS.
“One of the reasons I'm such a big fan of FARO’s products is their customer service,” admits Bellitto. “Christine and I have worked together for seven years in the quality inspection arena; we understand customer service. It's a big part of repeat business. That is what we strive for with our customers, so when we received the level of service that we did from the FARO reps Elliott, Mason and Bryton, it said a lot about their commitment. They were more concerned with our needs than theirs.”
Outcome
Plasan’s quality department is discovering a multitude of ways the FARO equipment enhances their operations.
“We're building a lot of post-launch dimensional verification into our processes,” explains Bellitto. “We’re also verifying our gauging fixtures with our QuantumS, as well as utilizing it to build checks and balances right into our processes, so it's getting a lot more uses than just product verification.
“As we're advancing our quality department, our thought process is to use the ‘repeat build’ inspection programs. As we build a library of programs, we can train operators at an intermediate level versus an advanced level to take over that responsibility. The FARO CAM2® software is very intuitive and user-friendly for new users.”
The portability factor of the QuantumS facilitates easier faster fixture verification.
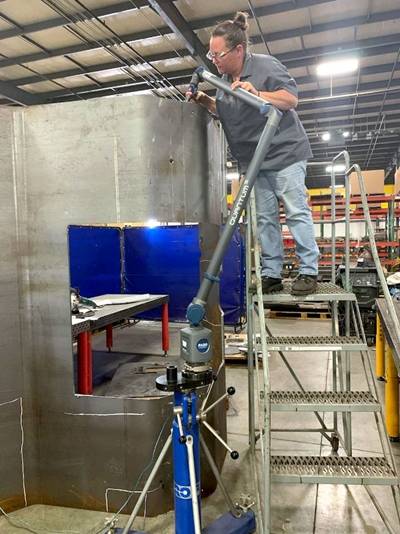
“We have a laptop that's connected to our scanner via WiFi, so I do everything cordless when I go out on the floor,” says Foley. “I just wheel it out to the area where the larger parts are. It's nice. In fact, I had to explain this to some of our upper management team, because they were insisting that we needed a fixed CMM. I said, ‘Why would I waste the real estate for a fixed-CMM enclosure when I can take the QuantumS out to the part and get sufficiently accurate measurements there?’”
In our manufacturing processes, we have quite a bit of material movement through our facility. The ability to inspect out on the floor significantly reduces that issue.
Tony Bellitto
Quality Manager at Plasan North America
Return On Investment
Accuracy
“We’ve had a government source inspector come in – very knowledgeable and educated on GD&T – and comment that he’s seen significant improvement in our data accuracy and reporting,” said Bellitto.
Speed
“Using the QuantumS has reduced my dial-in time by about two-thirds,” states Foley. “On average, a PPAP would take me about two days because, on some of these parts, there can be a little over a thousand measurements that I have to declare. Where set-up used to be an hour or two, it’s now more like twenty minutes. The accuracy is just on point, and when I can see those numbers and know how accurate it is, and see how easily I've aligned to CAD, it's just been a blessing.”
When asked to evaluate the FARO QuantumS ScanArm on various criteria, Foley and Bellitto gave the following ratings:
| Criteria: | Rating: |
| Accuracy and repeatability | Excellent |
| Speed of measurement | Game changer |
| Ease of use | Game changer |
| Portability | Game changer |
