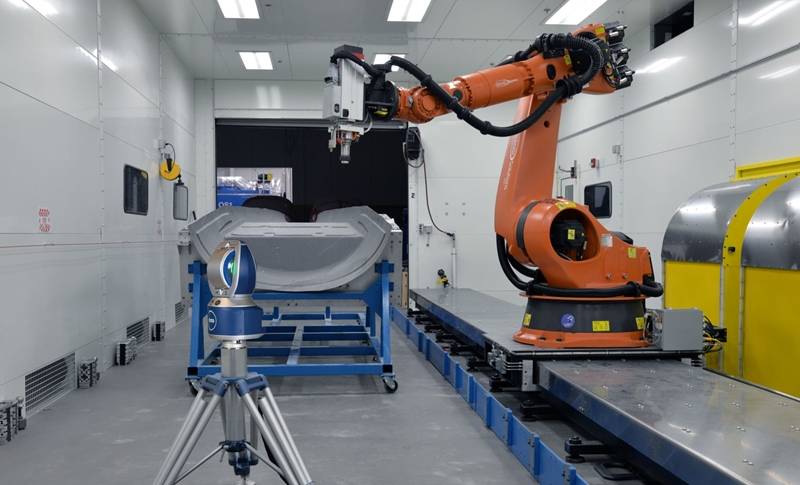
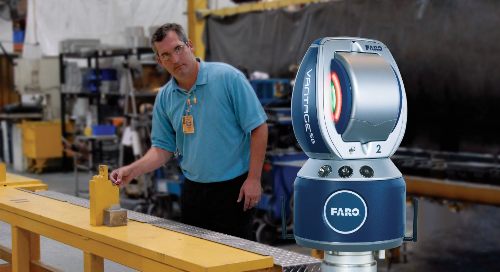
For industries that regularly need to perform large-scale measurements, Laser Trackers offer accurate 3D measurements collected by a single operator. They have traditionally been a common solution within the aerospace and automotive industries, but Laser Trackers are beneficial across several applications relevant to other industries involved in manufacturing.
![]() Laser Trackers are straightforward tools: they measure two angles, plus a distance. The tracker sends a laser beam (hence, "Laser Tracker") to a retroreflective target (commonly a spherically mounted retro reflector, or SMR) that is held against the object being measured. The light reflected traces its own path back to the tracker. As the light re-enters the tracker, a distance meter in the tracker calculates the distance from the tracker to the retroreflector. The collected coordinate data is transferred to metrology software to establish the X, Y and Z coordinates for the point measured. The software ultimately uses a collection of the points taken for interpretation and modeling.
Laser Trackers are straightforward tools: they measure two angles, plus a distance. The tracker sends a laser beam (hence, "Laser Tracker") to a retroreflective target (commonly a spherically mounted retro reflector, or SMR) that is held against the object being measured. The light reflected traces its own path back to the tracker. As the light re-enters the tracker, a distance meter in the tracker calculates the distance from the tracker to the retroreflector. The collected coordinate data is transferred to metrology software to establish the X, Y and Z coordinates for the point measured. The software ultimately uses a collection of the points taken for interpretation and modeling.
Laser Trackers use one of two types of distance meters. The first is the interferometer, which uses relative distance to measure — meaning that it can accurately measure the movement of a target but cannot provide absolute position. The second, which FARO® uses, is the absolute distance meter (ADM). Most Laser Trackers use ADM technology.
ADM technology is based on phase shift technology, which works by sending out a signal of known wavelength to a target, then measuring the difference in the phase of the signal received. The difference gives the distance to the tracker. Multiple wavelengths must be sent, beginning with a long wavelength signal to provide a rough estimate of where the target is, followed by shorter wavelengths to provide more precision. ADM tends to be highly accurate but has slower measurement time. FARO developed an “Advanced ADM” system, which decreases the time needed for the signal to change frequencies. FARO’s sixth generation of ADM technology is Integrated Absolute Distant Measurement (iADM). iADM allows angle and distance to be measured from the same laser beam. This eliminates the errors and drift that are sometimes associated with two-beam ADM technology.

Some industries have avoided adopting Laser Tracker technology based on outdated perceptions of how difficult they are to use. Typically, measuring was a very manual effort requiring absolute line-of-sight between the laser unit and the SMR – if anything got between the two, the beam would be broken and the sequence would have to start again. Operators needed more extensive training and experience to use the Laser Tracker efficiently.
Recent innovations, such as the ActiveSeek™ feature on the FARO Vantage Laser Trackers, have mitigated this concern by allowing the laser to actively locate and lock onto the target even if the line-of-sight beam is broken. Consequently, operators can begin using the technology without needing rigorous training and the time needed to measure large or complicated objects is dramatically reduced. Additionally, using an accessory such as a 6Probe provides wireless, hand-held assistance when measuring hidden or hard-to-reach areas through its 6 Degrees of Freedom (6DoF) capability. These features make Laser Trackers a widely-applicable, rapid and easy-to-use solution.
Like many 3D measurement devises, Laser Trackers vary in speed and accuracy depending on build and specifications. As mentioned above, Laser Trackers have applicability across the manufacturing lifecycle, including:
Alignment: perform real-time measurement during the assembly process to confirm tolerances and maintain or improve quality control
Machine installation, alignment and maintenance: ensure machine calibration and monitor mechanical parts to keep them within operational specifications
Part and assembly inspection: produce a digital record of actual (versus nominal) data to validate conformance to quality requirements
Tool, die and mold building: perform volumetric accuracy measurements to monitor wear and ensure consistency
Reverse engineering: acquire precise digital measurement data on parts or assemblies for which blueprints or CAD drawings do not exist
Robot calibration: Perform on-site, routine maintenance calibrations on robots to ensure conformance to specifications and uniform output
Want to learn more about Laser Trackers?
Additional resources:
- [Read] Understanding Laser Tracker targets - Here
- [Read] Using Laser Trackers to increase revenue & reduce risk in the industrial sector - Here
- [Read] Increase speed & profitability with six degrees of freedom - Here
- [Watch] Making large-scale metrology faster & easier - Here
- [Watch] How a Laser Tracker works - Here
- [Watch] – Vantage S & E Laser Tracker overview - Here
If you’re interested in learning more about FARO’s Laser Tracker solutions, click here.
Have a question about using Laser Trackers? Contact us here.
