Originally published in Industry Update on 7/6/2018
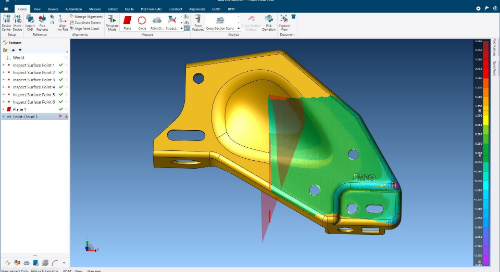
FARO® CAM2® is specifically designed to enable users to attain the full operational potential of their FARO hardware, ranging from small to large volume measurements.
The software improves the user experience through its seamless integration with the company’s portable coordinate measuring machines (including the FaroArm, FARO ScanArm and FARO Laser Tracker), an advanced user interface that streamlines and simplifies most inspection activities, and new reporting dashboards that facilitate short cycle, actionable intelligence.
CAM2 is the only metrology platform that includes repeat part management (RPM), a function that allows any user to conduct inspections, enabling more control over the actual inspection routines. This information is then reported to a cloud database, where process trends and reports can be viewed by anyone within the organization on a web browser or mobile phone.
Repeat part management
The RPM function consists of three components: the RPM Control Station, RPM Control Server, and RPM Control Centre. The RPM Control Station is an extension of the CAM2 ecosystem. An inspection program or QuickTool of a part can be made either offline or with a real-world part and this can be published to and accessed via the central RPM Control Server at the click of a button and executed by the stand-alone RPM Control Station application.
The resulting inspection report information can then be viewed with any web browser via the RPM Control Center.
With RPM, a user can upload a CAM2 QuickTool to perform a fully guided inspection routine through the RPM Control Station, enabling the inspection process to be executed by anyone, anywhere across the factory floor, and on any connected FARO device, through a simple graphical user interface.
These guided inspection routines come with real-time feedback and guidance, which help to ensure consistency in inspections across operators and makes it easier to increase the efficacy of in-line inspections.
QuickTools can also be shared across the company on a singular network, allowing similar parts to be measured in multiple locations without compromising on consistency and quality.
In addition, there is also the possibility of integrating CAM2 onto production lines so manufacturers can automate their production inspection process.
The road to Industry 4.0

According to Willie Tan, Product Marketing, Asia Pacific, FARO Technologies: “FARO believes that intelligent measuring and evaluation systems are important for the progression towards Industry 4.0. The Internet of Things allows the transformation of inspection data into knowledge, and increases the data’s digital footprint within a customer’s organization – and FARO products are already an integral part of the manufacturing and quality assurance processes.”
With CAM2 Software, users can quickly and easily accomplish their measurement tasks and capture actionable business data through its intuitive user interface and image-guided, automated measurement workflows. The software provides a seamless and manageable measurement experience for all users, without the need for extensive training or expertise, along with accurate and comprehensive insight into their measurement results.
FARO also offers the CAM2 Remote app on Apple platforms, where users can also use their Apple devices to communicate with their CAM2 platform wirelessly, and thus conduct remote measurements: run commands, change scanning modes, take positions, and see results in real time.
The RPM Control Station feature allows data to be accessed easily, and such data can be used by both metrology and non-inspection professionals. Application of the data can be expanded beyond the inspection of individual pieces, to include the management of manufacturing operations while looking at real-time process trends, analytics, historical performance, as well as an archive of inspection results.
For example, a plant manager can simply access the data dashboard on his mobile phone while he’s out, to ensure that everything is running smoothly on the production floor, or to make an informed decision in response to an urgent situation on the production line. Similarly, a manufacturing engineer can monitor whether the process yield trend is moving out of tolerance and initiate the necessary process adjustments or tool changes where needed.
Furthermore, the ease of use and infrastructure of CAM2 and its RPM functionality eliminates the complexity of setup and management of a cloud-based system. This empowers smaller companies to enjoy the same benefits that usually only larger multinational organizations have access to, without any additional hardware or extensive IT support.

